Logging is an essential component of any good software development process. Through logging, you can detect and fix issues, understand the behavior of your users, and even obtain valuable business insights. However, logging involves many tricky issues and problems you need to solve. So, you shouldn’t do it all alone.
Request a personalized demo to see how DataSet can help you detect and mitigate vulnerabilities such as Log4Shell.
Instead, the best practice is to employ one of the many logging frameworks at your disposal. While they do all the heavy lifting, you can focus on improving your app and delivering value for your users. In this post, we’re going to talk about one such framework, log4j2, in the context of a Maven project.
The post starts covering some fundamentals, by giving you a brief overview of both log4j2 and Maven, so you understand better what these tools are all about. Then, we get to the main part of the post, where we give you a step-by-step guide on how to use log4j2 with Maven.
Let’s begin!

Log4j2 Maven Configuration: Let’s Start With the Basics
As promised, we start with the fundamentals. What are Log4j2 and Maven and why you should care?
Log4j2 is a logging framework for the Java language, maintained by the Apache foundation. Log4j2 is an improvement over its predecessor, Log4j. Its main benefits are:
- API independent of implementation
- Better support for concurrency
- Easy to extend by building custom components
Maven is a build automation tool used mainly for Java projects. Like Log4j2, Maven is also an Apache project.
Maven addresses two important aspects of software: how it’s built and how its dependencies are managed. It uses conventions for the build process, which makes configuration easier since just the exceptions need to be written down.

Log4j2 Maven Configuration: A Step-By-Step Guide
After taking care of the fundamentals, we’re now ready to cover the main part of the post. Roll up your sleeves and follow our simple tutorial to learn how to use Log4j2 with your Maven projects.
Creating a New Maven Project
To perform application logging, we need an application, so let’s start there. For this tutorial, we’re going to use the free IntelliJ IDEA Community Edition IDE. If you don’t have it, download it and install it so we can go ahead. When installing the IDE, make sure to enable the installation of the Maven plugin. As soon as the installation is complete, we’re ready to go.
So, in the initial window on IntelliJ IDEA, click on “Create New Project,” like in the following image:
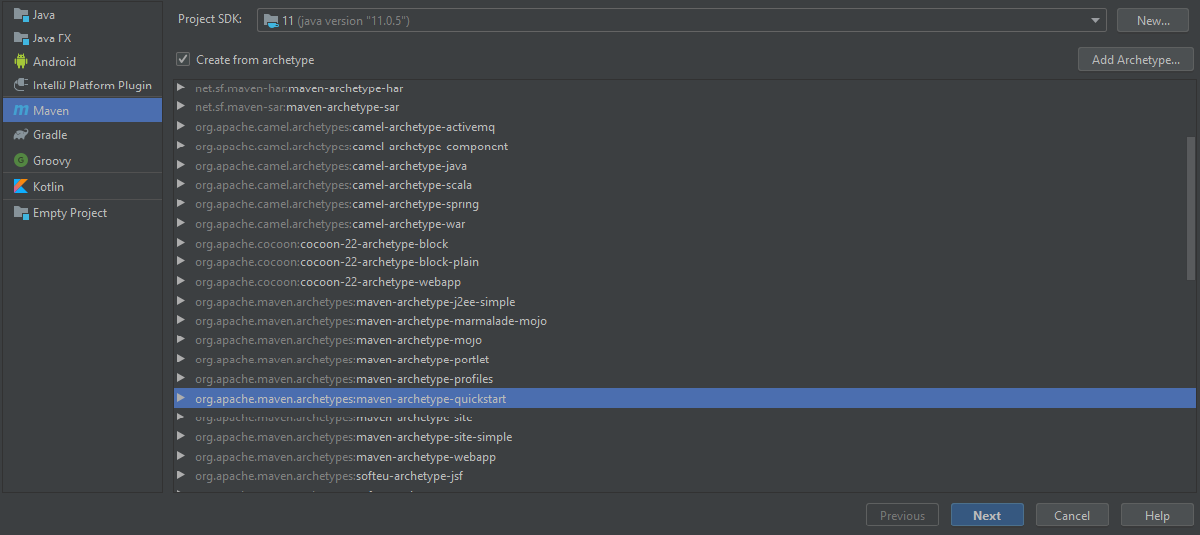
On the next screen, select “Maven” as the type for the project on the left panel. Then, select the “Create from archetype” option and then select “maven-archetype-quickstart” from the list of archetypes. Finally, click on “Next.”
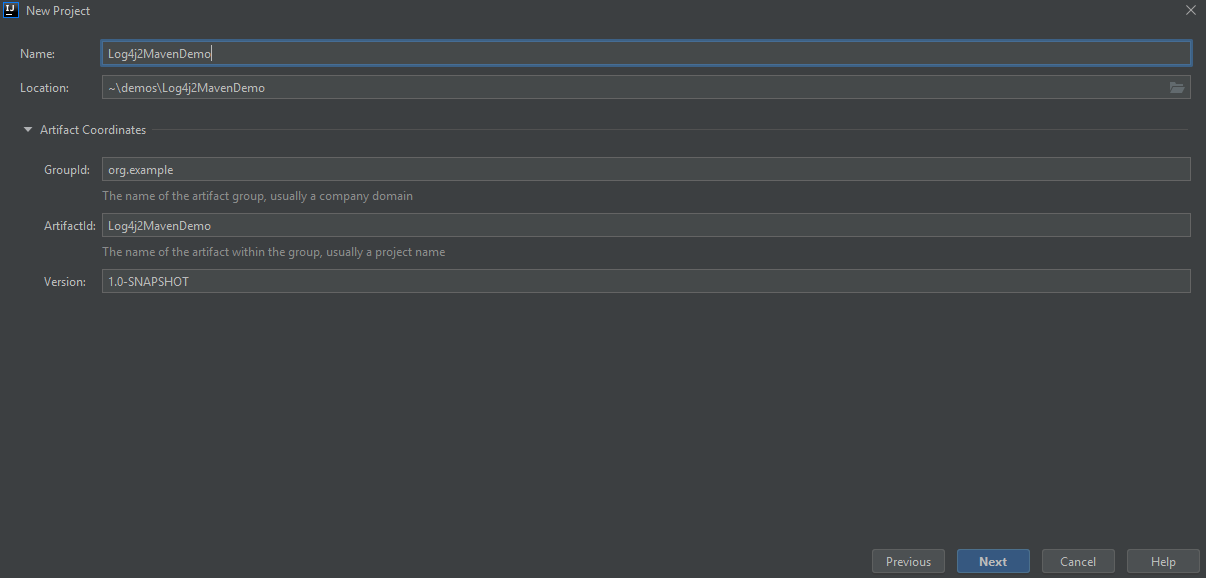
On the next screen, enter the name and location for the application and leave the rest as default. Then, you can click on “Next.”
The final screen is a summary of the new project. After reviewing the information, click on “Finish.”
If everything went right, you should see your pom.xml file, waiting to be edited. When you see a popup notification asking if you wish to automatically import Maven changes, accept it. It will make the process easier and, since this app is very small, it shouldn’t take long.
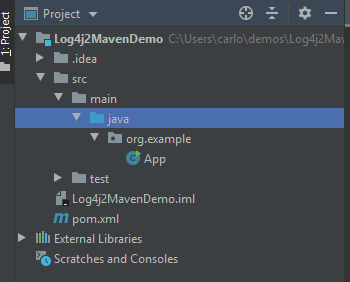
On the left side, you should also see the “Project” tab, displaying the structure created for your project:
Adding Some Code to Our Application
If you open the “App” class that was generated, you’ll see that, ignoring the boilerplate, it contains just one line of “real” code that displays the (in)famous “Hello World!” line.
We’re going to change that code a little bit. Instead of saying “Hello World!”, it’s going to print “Hello, user!”, paying homage to the very first article on the “Getting Started With Logging Quickly” series.
Also, we’re going to add two logging statements: one before and one after printing the message. Since we don’t have a logging framework yet, we’re going to use some comments as placeholders for the actual logging commands. So, the resulting code should look like this:
public static void main( String[] args ) {
	// let's pretend we're logging!
	System.out.println( "Hello World!" );
	// let's pretend we're logging again!
}
Run the app by going to the “Run” menu and then clicking on the “Run” command. If everything went right, you should see “Hello, user!” in the output window.
Installing Log4j2
We’re now going to install the Log4j2 framework so that we can replace the placeholders with actual logging. Since this is a Maven project, we declare dependencies by adding them to our pom.xml file. So, let’s do that. Copy the code below and paste it on your pom.xml file:
<dependencies>
  <dependency>
    <groupId>org.apache.logging.log4j</groupId>
    <artifactId>log4j-api</artifactId>
    <version>2.13.0</version>
  </dependency>
  <dependency>
    <groupId>org.apache.logging.log4j</groupId>
    <artifactId>log4j-core</artifactId>
    <version>2.13.0</version>
  </dependency>
</dependencies>
If you have correctly configured Maven to import changes automatically, the dependency should be imported after you save the file.
Let’s Add Some Logging
Now that we have Log4j2 installed, we’re going to add some logging statements to try it out.
First, add the following two imports to the top of your “App” class:
import org.apache.logging.log4j.LogManager;
import org.apache.logging.log4j.Logger;
Then, you’re going to need a logger instance. Add the following line to the start of your “App” class:
private static final Logger logger = LogManager.getLogger(App.class);
Finally, add the following code to your main class, just after printing the message:
logger.trace("We've just greeted the user!");
logger.debug("We've just greeted the user!");
logger.info("We've just greeted the user!");
logger.warn("We've just greeted the user!");
logger.error("We've just greeted the user!");
logger.fatal("We've just greeted the user!");
That’s how the whole code should look like:
package org.example;

import org.apache.logging.log4j.LogManager;
import org.apache.logging.log4j.Logger;

public class App {
    private static final Logger logger = LogManager.getLogger(App.class);

    public static void main( String[] args ) {
        System.out.println( "Hello, user!" );
        logger.trace("We've just greeted the user!");
        logger.debug("We've just greeted the user!");
        logger.info("We've just greeted the user!");
        logger.warn("We've just greeted the user!");
        logger.error("We've just greeted the user!");
        logger.fatal("We've just greeted the user!");
    }
}
Now, let’s run our application again. If everything went right, that’s what you should see in the terminal:
Hello, user!
16:53:12.149 [main] ERROR org.example.App - We've just greeted the user!
16:53:12.156 [main] FATAL org.example.App - We've just greeted the user!

Process finished with exit code 0
As you can see, only the messages with the “error” and “fatal” logging levels were displayed, even though we’ve logged using all of the logging levels available in Log4j2. What’s happening?
Log4j2 Default Configuration
As it turns out, we haven’t configured Log4j2, which means it has resorted to its default configuration. The default configuration simply logs to the console log entries with the level configured as “error” or higher. That’s why the messages with levels debug, trace, info, and war weren’t logged.
Adding a Custom Configuration for Log4j2
Log4j2’s custom configuration isn’t enough for most real use cases. After all, you probably want to log to more useful targets than the console. You’ll also want to log using the other logging levels. So, now, we’re going to see how to configure Log4j2 beyond its default configurations.
Log4j2, like many other logging frameworks, can be configured both programmatically but also via configuration files. For this tutorial, we’re going to go with the configuration file approach. We’re going to create a minimum viable Log4j2 using an XML file, which is one of the formats that the framework supports.
Creating the Config File
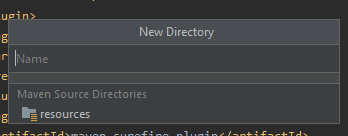
To begin, go to the “Project” window. Under “src,” right-click the “main” directory, go to “New,” and then “Directory.” You’ll see a new screen prompting you for the new directory’s name. Click on “resources,” under “Maven Source Directories,” like in the following image:
Now, go back to the “Project” window, right-click the newly created “Resources” folder, go the “New” and then to “File.” When prompted for a name, enter “log4j2.xml” and press enter. The IDE will create the file and open it for you. Copy the content below, paste it, and save:
<?xml version="1.0" encoding="UTF-8"?>
<Configuration status="INFO">
    <Appenders>
        <Console name="ConsoleAppender" target="SYSTEM_OUT">
            <PatternLayout pattern="%d{HH:mm:ss.SSS} [%t] %-5level %logger{36} - %msg%n" />
        </Console>
        <File name="FileAppender" fileName="application-${date:yyyyMMdd}.log" immediateFlush="false" append="true">
            <PatternLayout pattern="%d{yyy-MM-dd HH:mm:ss.SSS} [%t] %-5level %logger{36} - %msg%n"/>
        </File>
    </Appenders>
    <Loggers>
        <Root level="debug">
            <AppenderRef ref="ConsoleAppender" />
            <AppenderRef ref="FileAppender"/>
        </Root>
    </Loggers>
</Configuration>
Now, you can run the application again. If everything went right, that’s what you’ll see in your terminal:
Hello, user! 2020-06-29 10:29:31.288 [main] DEBUG org.example.App - We've just greeted the user! 2020-06-29 10:29:31.293 [main] INFO org.example.App - We've just greeted the user! 2020-06-29 10:29:31.294 [main] WARN org.example.App - We've just greeted the user! 2020-06-29 10:29:31.294 [main] ERROR org.example.App - We've just greeted the user! 2020-06-29 10:29:31.295 [main] FATAL org.example.App - We've just greeted the user!
Go to the output location for the application, and you should see the log file there:
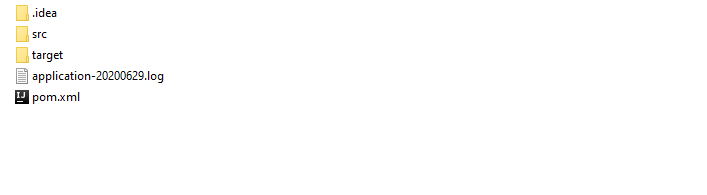
The file’s content should look like this:
2020-06-29 10:29:31.288 [main] DEBUG org.example.App - We've just greeted the user! 2020-06-29 10:29:31.293 [main] INFO org.example.App - We've just greeted the user! 2020-06-29 10:29:31.294 [main] WARN org.example.App - We've just greeted the user! 2020-06-29 10:29:31.294 [main] ERROR org.example.App - We've just greeted the user! 2020-06-29 10:29:31.295 [main] FATAL org.example.App - We've just greeted the user!
What has happened?
Explaining the Configuration File
Take a closer look at our configuration file. It starts by defining two appenders, one called “FileAppender,” and the other called “ConsoleAppender.” But what is an appender? An appender is the component that effectively writes the log message to its destination. The first appender defines stdout as its target, while the second defines a pattern for a file name. In other words, the first appender logs to the standard output while the second one logs to a file.
The file then proceeds to define a logger. The logger is responsible for actually logging the messages that get passed to it. Each logger can reference one or more appenders, and that’s exactly what’s happening here. The logger references both appenders, so when it’s called, it’s going to log both to the standard output and to the logfile.

Use the Best Tools Available and Take Your Logging to the Next Level
The Java world is one of the richest software ecosystems out there. It offers plenty of solutions for virtually any known software problem. With logging it is no different: there are many logging libraries and frameworks available.
Log4j2 is one of those. In today’s post, you’ve seen how to install, configure and use it on a Maven project. Of course, what you’ve seen today isn’t all there is to know about logging or Maven. But it’s a good start to learn how to use this flexible logging framework along with a powerful build system.
Where should you go from here?
Well, as it turns out, you’re already at the right place to learn more about everything logging: the DataSet blog. We’re always publishing articles on a variety of topics related to logging and monitoring. DataSet can take your logging approach to a whole another level. If you haven't started yet, you can get a free and fully functional trial for 30 days.
Thanks for reading, and happy logging!