|
|
Let’s continue our ongoing series on getting starting with loggers for different languages and platforms.
Back in March, we covered logging with Ruby; now it’s time to take a look at the platform most often associated with that language, Rails.
We’ll start with a simple application with scaffolding for CRUD operations on a single record. We’ll look at Rails’ default logging configuration and how to use logging in an application.
Then we’ll look at how logging can be improved and why you might want to improve it.

This tutorial uses Ruby v2.5.1 and Rails 5.2.0. You’ll need to have them installed to follow along.
These instructions will use the command line to create and configure the application and will not rely on a specific IDE or editor. We’ll let Rails use SQLite for the backend database.
Create a Rails Application
We’ll start off by creating a Rails application. Run this command first.
$ rails new logging_app
      create
      create  README.md
....
$
After few screens of output, Rails has created the application.
Next, we’ll let Rails create a model and a controller for us so we have something interesting to log. Move into the logging_app directory and run this.
$ cd logging_app/
$ rails generate scaffold User name:string email:string
Running via Spring preloader in process 60139
...
$
Rails creates the scaffolding for a user record with a name and an email address.
Finally, have Rails migrate the application into SQLite.
$ rails db:migrate
== 20180630222133 CreateUsers: migrating ======================================
-- create_table(:users)
   -> 0.0010s
== 20180630222133 CreateUsers: migrated (0.0014s) =============================
$
And we have an application! Let’s run it and confirm that’s all set up.
$ rails server
=> Booting Puma
=> Rails 5.2.0 application starting in development
=> Run `rails server -h` for more startup options
Puma starting in single mode...
* Version 3.11.4 (ruby 2.5.1-p57), codename: Love Song
* Min threads: 5, max threads: 5
* Environment: development
* Listening on tcp://0.0.0.0:3000
Use Ctrl-C to stop
Point a browser at http://localhost:3000/users, and we see our main page for managing users.
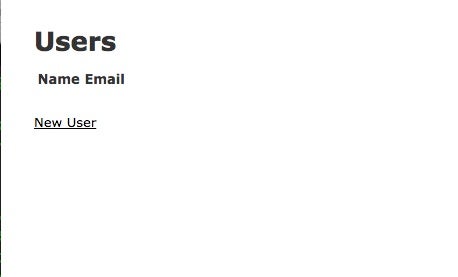
We’re ready to get started with logging!
Rails Logger
Rails creates an instance of ActiveSupport::Logger as part of initialization and uses it for logging to standard output.
Take a look at the application output when we open the /users page:
Started GET "/users" for 127.0.0.1 at 2018-06-30 18:29:19 -0400
Processing by UsersController#index as HTML
  Rendering users/index.html.erb within layouts/application
  User Load (1.4ms)  SELECT "users".* FROM "users"
  ↳ app/views/users/index.html.erb:15
  Rendered users/index.html.erb within layouts/application (5.1ms)
Completed 200 OK in 525ms (Views: 512.4ms | ActiveRecord: 1.8ms)
Logger produces this output. In addition to standard output, we can find the same input in the default log file. Let’s stop the server and take a look at the last ten lines of the log file.
^C- Gracefully stopping, waiting for requests to finish
=== puma shutdown: 2018-06-30 18:46:43 -0400 ===
- Goodbye!
Exiting
$ tail -10 log/development.log

Started GET "/users" for 127.0.0.1 at 2018-06-30 18:29:19 -0400
Processing by UsersController#index as HTML
  Rendering users/index.html.erb within layouts/application
  User Load (1.4ms)  SELECT "users".* FROM "users"
  ↳ app/views/users/index.html.erb:15
  Rendered users/index.html.erb within layouts/application (5.1ms)
Completed 200 OK in 525ms (Views: 512.4ms | ActiveRecord: 1.8ms)
The default name of the log file is the environment name. In development, it’s named development.log; in production, it’s named production.log; and so on.
The default logger is available to application code in a globally accessible instance named logger.
Let’s add an extra debug message when the application displays a user.
First, add a log message to app/user_controller.rb in the show method.
# GET /users/1
# GET /users/1.json
def show
  logger.debug "Showing user: " + @user.inspect
end
Then start the application. Go to the /users and add a user named John Doe with an email address of [email protected].
Your log should have an entry similar to this:
Started GET "/users/1" for 127.0.0.1 at 2018-06-30 19:05:35 -0400
Processing by UsersController#show as HTML
  Parameters: {"id"=>"3"}
  User Load (0.2ms)  SELECT  "users".* FROM "users" WHERE "users"."id" = ? LIMIT ?  [["id", 1], ["LIMIT", 1]]
  ↳ app/controllers/users_controller.rb:68
Showing user: #<User id: 1, name: "John Doe", email: "[email protected]", created_at: "2018-06-30 23:05:35", updated_at: "2018-06-30 23:05:35">
  Rendering users/show.html.erb within layouts/application
  Rendered users/show.html.erb within layouts/application (0.7ms)
Completed 200 OK in 40ms (Views: 33.6ms | ActiveRecord: 0.2ms)
Rails has a reputation for making life easy for developers, and logging is an example of why.
Let’s look at how we can customize Rails Logger.
What Is Application Logging?
Before we delve into how to improve the Rails logger, let’s go back to first principles. What are we trying to do? What is application logging? We’ve got a good definition in an earlier post in this series.
Application logging involves recording information about your application’s runtime behavior to a more persistent medium.
We’ve already covered that in Rails. We have a way to record information about our application to a file and to standard output, which our DevOps can redirect to where they wish with standard output.
But we can do more.
What Is Application Logging for?
Why do we write logs? It seems like an obvious question, but it’s worth considering.
We write logs so we have a record of what’s happening.
We’ve released our code to production, and we need to get to work on something else. But at some point, something will go wrong, and we’ll be asked to diagnose the problem.
Logs are often the only thing we have.
We may also be asked for information about what’s happening in production when nothing is wrong:
- How many pages are loaded per day?
- Per hour?
- Per minute?
- Where are users coming from?
- What features are used most often, and what features are ignored?
While some of this information is available from web analytics, logs can drill down to a higher level of detail.
Application logging is a critical tool for helping us locate and fix errors and for collecting information that can help us improve our applications.
What Information Should We Log?
The messages we’ve seen from Rails are messages about what is happening in the application. They lack context, though.
Let’s define what we want from a log message and then configure the system to give us that.
A log entry represents an event. Something happened to the application, and the developer thought it was interesting enough to save for later review.
The most obvious thing we might want to know about an event is when it happened. None of the log entries we’ve seen so far have a timestamp on them. We’ll need to add that.
It’s also useful to have some context. We added this log message to our code earlier.
logger.debug "Showing user: " + @user.inspect
Rails logged this:
Showing user: #<User id: 1, name: "John Doe", email: "[email protected]", created_at: "2018-06-30 23:05:35", updated_at: "2018-06-30 23:05:35">
What happened to debug? We called the logger at debug level, but that information was not passed on.
All of the log entries appear as equivalent with the default configuration, reducing their usefulness.
Let’s get started at changing the Rails logger’s configuration.
Configuring Logs
Like most loggers, ActiveSupport::Logger supports different levels. Those levels are debug, info, warn, error, and fatal.
We can log a message at any one of these levels by calling the associated method:
logger.fatal "This is very bad: " + e.message
This gives us a way to categorize messages, and we’ll add the level to the messages below. But let’s look at filtering messages first.
Debug messages are useful for, well, debugging. Their very name implies they’re for development or for isolating a problem.

We don’t typically want to see them in production where they can reduce the signal-to-noise ratio in log files and potentially compromise performance.
We can filter which messages make it to the console or log file in Rails configuration.
If we add this to our configuration, only messages logged at error or fatal will be logged.
config.log_level = :error
Rails has a hierarchal configurations scheme. We can add logging configuration in config/application.rb or config/environment/{environment_name}.rb. The environment-specific file takes precedence.
So when we add this to config/application.rb:
config.log_level = :error
And this to config/environment/development.rb:
config.log_level = :debug
We still see debug messages in development, but only error and fatal in production.
We can change the name and location of log files by supplying Rail with logger instance initialized with our preferences.
config.Logger = Logger.new("/var/log/logging_app/messages.log")
This also means we can create new subclasses of Logger if we want to change logging behavior.
But let’s change the behavior we’re most interest in right now: log message formatting.
Log Message Format
Rails configuration has a mechanism for supplying Rails with a log message formatter instance. The first step is creating that message formatter class.
# lib/message_formatter.rb
class MessageFormatter < ActiveSupport::Logger::SimpleFormatter
  def call(severity, time, progname, msg)
    formatted_severity = sprintf("%-5s",severity.to_s)
    formatted_time = time.strftime("%Y-%m-%d %H:%M:%S")
    "[#{formatted_severity} #{formatted_time} #{$}] : #{progname} #{msg}\n"
  end
end
We extended the ActiveSupport::Logger::SimpleFormatter and overloaded its call method. We need an instance of SimpleFormatter for the configuration.
Logger passes call four parameters. They are the log level (as severity), the time of the message, program name, and the message.
We formatted the severity into a fixed width field and the time as a human-readable string. Then we put the parts together into a familiar message format.
There are a variety of ways we can add this class to our code.
The use of the libs directory can be controversial with Rails, but we’ll use it for the sake of getting a formatter installed.
First, create the formatter class in logging_app/libs as message_formatter.rb.
Next, since Rails 5.x does not load classes from lib automatically, add these lines to config/application.rb in the LoggingApp class declaration.
config.autoload_paths << Rails.root.join("lib")
config.eager_load_paths << Rails.root.join("lib")
Finally, add the formatter to config/environment/development.rb
config.log_formatter = MessageFormatter.new
When we run the server and open a user entry, we see log messages with our custom format.
[INFO  2018-07-01 11:55:04 65048] :  Started GET "/users/5" for 127.0.0.1 at 2018-07-01 11:55:04 -0400
[INFO  2018-07-01 11:55:04 65048] :  Processing by UsersController#show as HTML
[INFO  2018-07-01 11:55:04 65048] :    Parameters: {"id"=>"5"}
[DEBUG 2018-07-01 11:55:04 65048] :    User Load (0.4ms)  SELECT  "users".* FROM "users" WHERE "users"."id" = ? LIMIT ?  [["id", 5], ["LIMIT", 1]]
[DEBUG 2018-07-01 11:55:04 65048] :    ↳ app/controllers/users_controller.rb:68
[DEBUG 2018-07-01 11:55:04 65048] :  Showing user: #<User id: 5, name: "Alfred E. Neuman", email: "[email protected]", created_at: "2018-07-01 15:54:21", updated_at: "2018-07-01 15:54:21">
[INFO  2018-07-01 11:55:04 65048] :    Rendering users/show.html.erb within layouts/application
[INFO  2018-07-01 11:55:04 65048] :    Rendered users/show.html.erb within layouts/application (0.6ms)
[INFO  2018-07-01 11:55:04 65048] :  Completed 200 OK in 104ms (Views: 90.8ms | ActiveRecord: 0.4ms)
We’ve added the logging severity and the timestamp to the message. The program name is not always used, but it will appear if specified in a call.
Rails Logger: Conclusion
We looked at the Rails logger and how to call it from our application code.
Then we looked at how to customize the configuration and extend the log messages to make them more useful.
There’s a great deal more you can do with logging, and you can learn it here on the Scalyr blog. We can help you with what to do, what not to do, and a great deal more.
So stick around for more, and keep learning!